E finalmente, depois de muito tempo de trabalho (sim, eu sou lento na pintura) e mais tempo ainda de concluído, venho aqui para trazer para vocês o trabalho completo do Gelgoog MG 2.0 Char.
Eu acho que já disse por aqui que não sou fã da maioria dos MS de Zeon... Prefiro muito mais os Gundam's e os Grunts da Federação e assemelhados. Mas ultimamente tenho sido atraído pelo nível de detalhamento do framme de alguns MS de Zeon... E o Gelgoog Foi um deles. Apesar de não ser um kit novo, o Gelgoog 2.0 tem um framme muito detalhado e bem divertido de montar.
And finally, after a long time of work (yes, I'm slow in painting) and more time still finished, I come here to bring to you the complete work of the Gelgoog MG 2.0 Char.
I think I've already said that I'm not a fan of most MS in Zeon ... I much prefer the Gundam's and the Federation Grunts and the like. But lately I've been drawn to the level of detail in the framing of some MS from Zeon ... And Gelgoog was one of them. Although not a new kit, Gelgoog 2.0 has a very detailed and very fun framing frame.

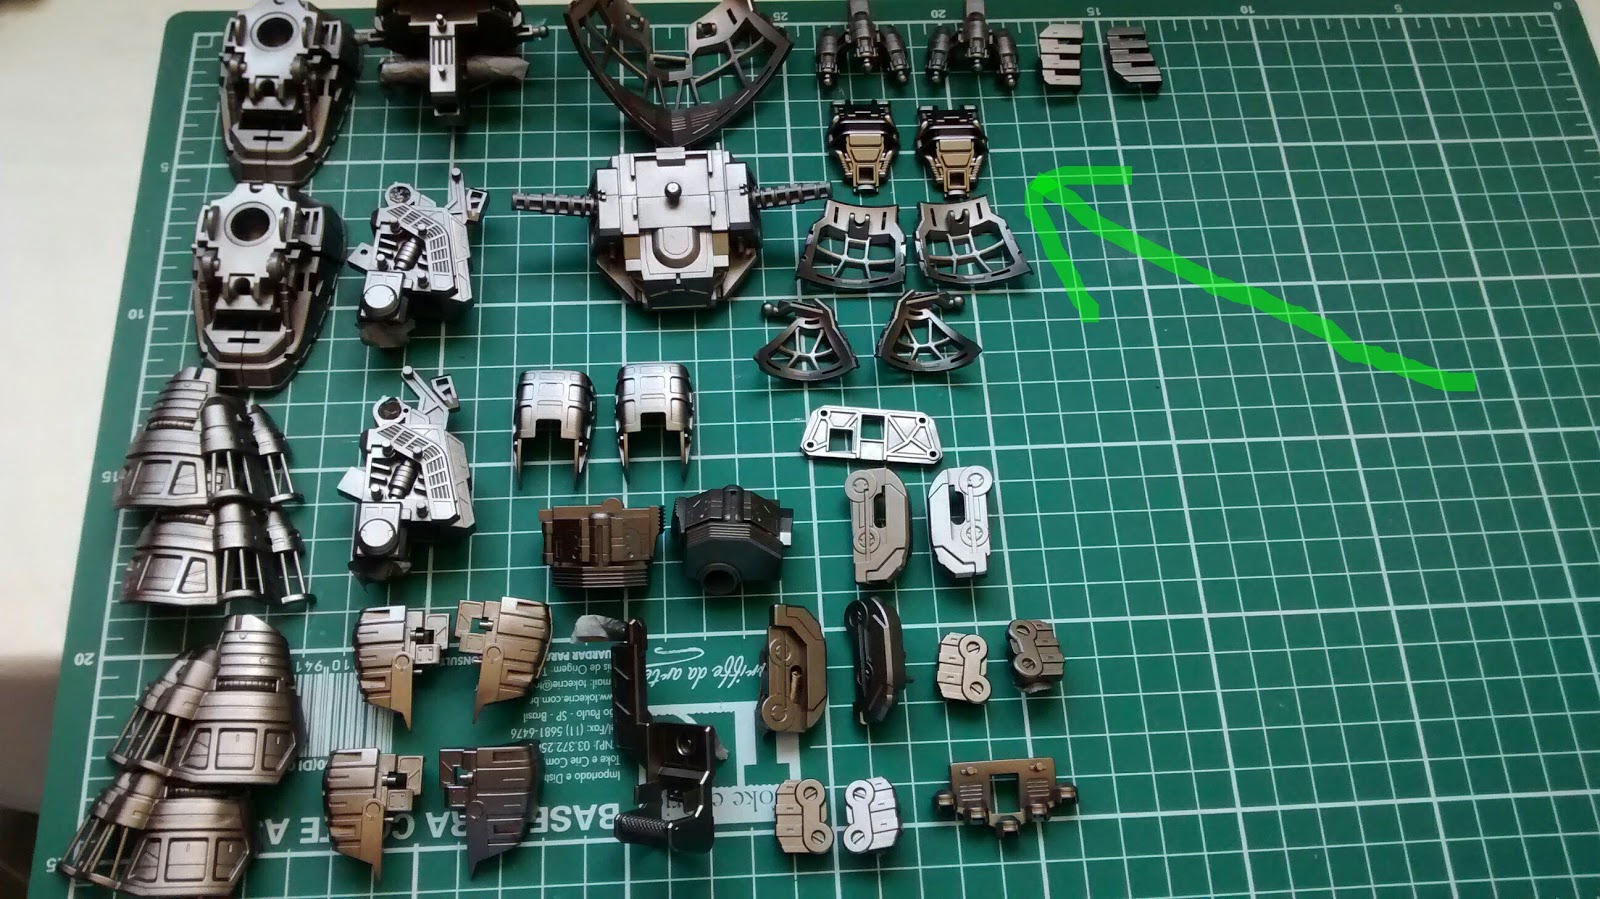
Eu não costumo fazer como a maioria das pessoas que montam todo o kit "out of box" e depois desmontam para customizar. Normalmente eu vou direto para a pintura após destacar as peças.
Então... primer nele!
I do not usually do like most people who assemble the whole kit "out of box" and then disassemble to customize. Usually I go straight to the painting after highlighting the pieces.
So ... primer on it!


Aqui já temos as primeiras camadas de tinta. Utilizei tinta Gaia Star Bright Silver + Gaia Black, para simular um Gunmetal (o meu acabou).
Here we have the first layers of paint. I used Gaia Star Bright Silver + Gaia Black ink to simulate a Gunmetal (mine is over).


Após a segunda camada a tonalidade já fica bem mais bonita e brilhante. Essas tintas Gaia são excelentes.
After the second layer the tonality is already much more beautiful and bright. These Gaia inks are excellent.

Fiz um pequeno teste em duas peças. Eu apliquei elas direto no plástico. A aderência da tinta é ótima e o nível de brilho é bem maior que as peças com primmer.
Recentemente descobri que preciso de lixas mais finas, o primer ainda está ficando meio áspero e isso está prejudicando um pouco o resultado das pinturas. Principalmente se eu quero um efeito brilhante.
I did a small two-piece test. I applied them straight into the plastic. The ink adhesion is optimum and the gloss level is much higher than the primers.
I recently discovered that I need thinner sandpaper, the primer is still getting a bit rough and this is damaging the result of the paintings a bit. Especially if I want a gloss effect.
Abaixo tem mais algumas fotos do Paint WIP :


Aqui nos pistões eu apliquei Tamiya Clear Red Acrílica sobre uma base laca prateada.
Here on the pistons I applied Tamiya Clear Red Acrylic on a silver lacquer base.


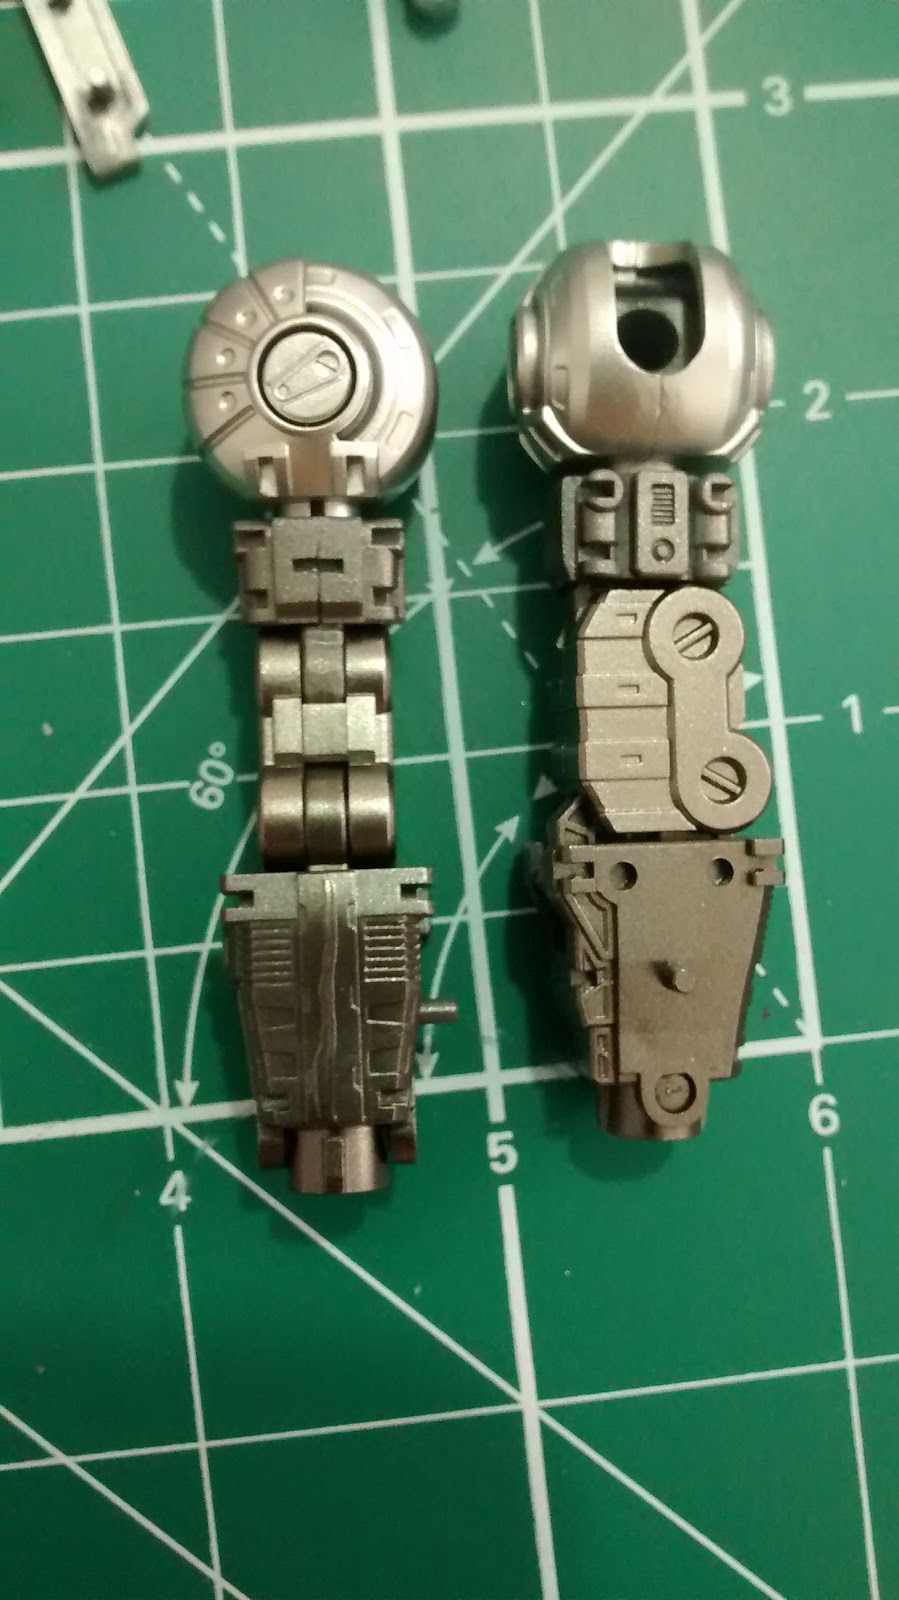
Essas fotos ficaram fora de ordem... e eu estou com preguiça de organizar elas. Este foi o momento que fiz alguns furos para adicionar peças de metal na armadura e também alguns plaplate.
These pictures were out of order ... and I'm too lazy to organize them. This was the time I did some holes to add metal pieces in the armor and also some plaplate.


E aqui temos o frame praticamente finalizado.
And here we have the frame almost finished.


Iniciando o pre-shading da armadura.


Aqui a primeira tentativa de adiconar canhões no gelgoog. Utilizei uma broca manual e algumas peças de metal para simular as armas.
Here the first attempt to add trucks in the gelgoog. I used a hand drill and a few pieces of metal to simulate the weapons.


PRESHADING!
Nossa, estou gostando muito desta técnica. Ela realmente adiciona um upgrade na aparência do kit.
Wow, I'm really enjoying this technique. It really adds an upgrade to the kit's appearance.


Os propulsores eu pintei com Gaia Star bright Silver + Gaia Ciano primário... é uma tinta com um toque clear bem útil.
The thrusters I painted with Gaia Star bright Silver + Gaia Cyan primer ... is an ink with a very useful clear touch.


Sooooo shining! XD

Basicamente a pintura da armadura foi: Vermelho Laca da Mr Color. E o Segundo tom da cor foi Vermelho laca da Mr Color + Preto. (não me lembro da proporção)
Basically the painting of the armor was: Red Color of Mr Color. And the second color tone was Mr Color + Black. (I do not remember the proportion)


Shield paint: Gaia Blue


E aqui meus senhores temos o trabalho pronto!
And here my gentlemen we have the job ready!


Ok, eu sei, fiz merda. A pintura não ficou devidamente lisa e o decal não aderiu bem. Como resultado uma parte rasgou...
Okay, I know, I fucked up. The paint was not properly smooth and the decal did not adhere well. As a result a part ripped ...

Ah, faltou mencionar que fiz DryBrush com tinta Tamiya Chrome Silver acrílica.
Ah, did not mention that I made DryBrush with Tamiya Chrome Acrylic Silver paint.


TallGeese vs Gelgoog
(é claro que o TallGeese ganha. Wing Gundam Sempre é melhor) XD
(of course the TallGeese wins.) Wing Gundam Always better) XD


E é isso pessoal. Foi um trabalho muito legal de se concluir... levei uns meses fazendo este kit... sempre aos poucos, testando... desfazendo os erros. Mas foi um excelente aprendizado. E hoje o Gelgoog pode se orgulhar de ser o maior item da minha coleção... até o dia que eu comprar um MS maior que ele. ahahahahaha
Espero que tenham gostado. Até breve.
And this is personal. It was a very cool job to conclude ... I took a few months doing this kit ... always slowly, testing ... undoing the errors. But it was an excellent learning experience. And today Gelgoog can boast of being the biggest item in my collection ... until the day I buy a MS bigger than it. ahahahahaha
I hope you enjoyed. See you soon.
Nenhum comentário:
Postar um comentário