Olá Olá pessoal.
Comemorando a passagem das três mil visualizações do Blog (sim, consegui!) venho postar o primeiro Mini Tutorial. Não tenho muitas técnicas para fazer meus kits, mas essa eu aprendi a algum tempo e gostaria de compartilhar com vocês.
Por muito tempo fiquei me perguntando como os Mestres Gunpla adicionavam aquelas partes metálicas nos Gundams que pareciam rebites e que ficam muito bonitos... Mas tudo não passa de materiais muito comuns e de fácil manuseio que qualquer um pode comprar. Vamos lá!
Hello Hello everybody.
Celebrating the passage of three thousand views Blog (yes, I could!) Come post the first Mini Tutorial. I have many techniques to make my starter, but that I learned some time and would like to share with you.
For a long time I was wondering how the Gunpla Masters were adding those metal parts in the Gundams that seemed rivets and are beautiful ... But it is all too common materials and easy to use that anyone can buy. Come on!
Materiais de Trabalho (Work Material)
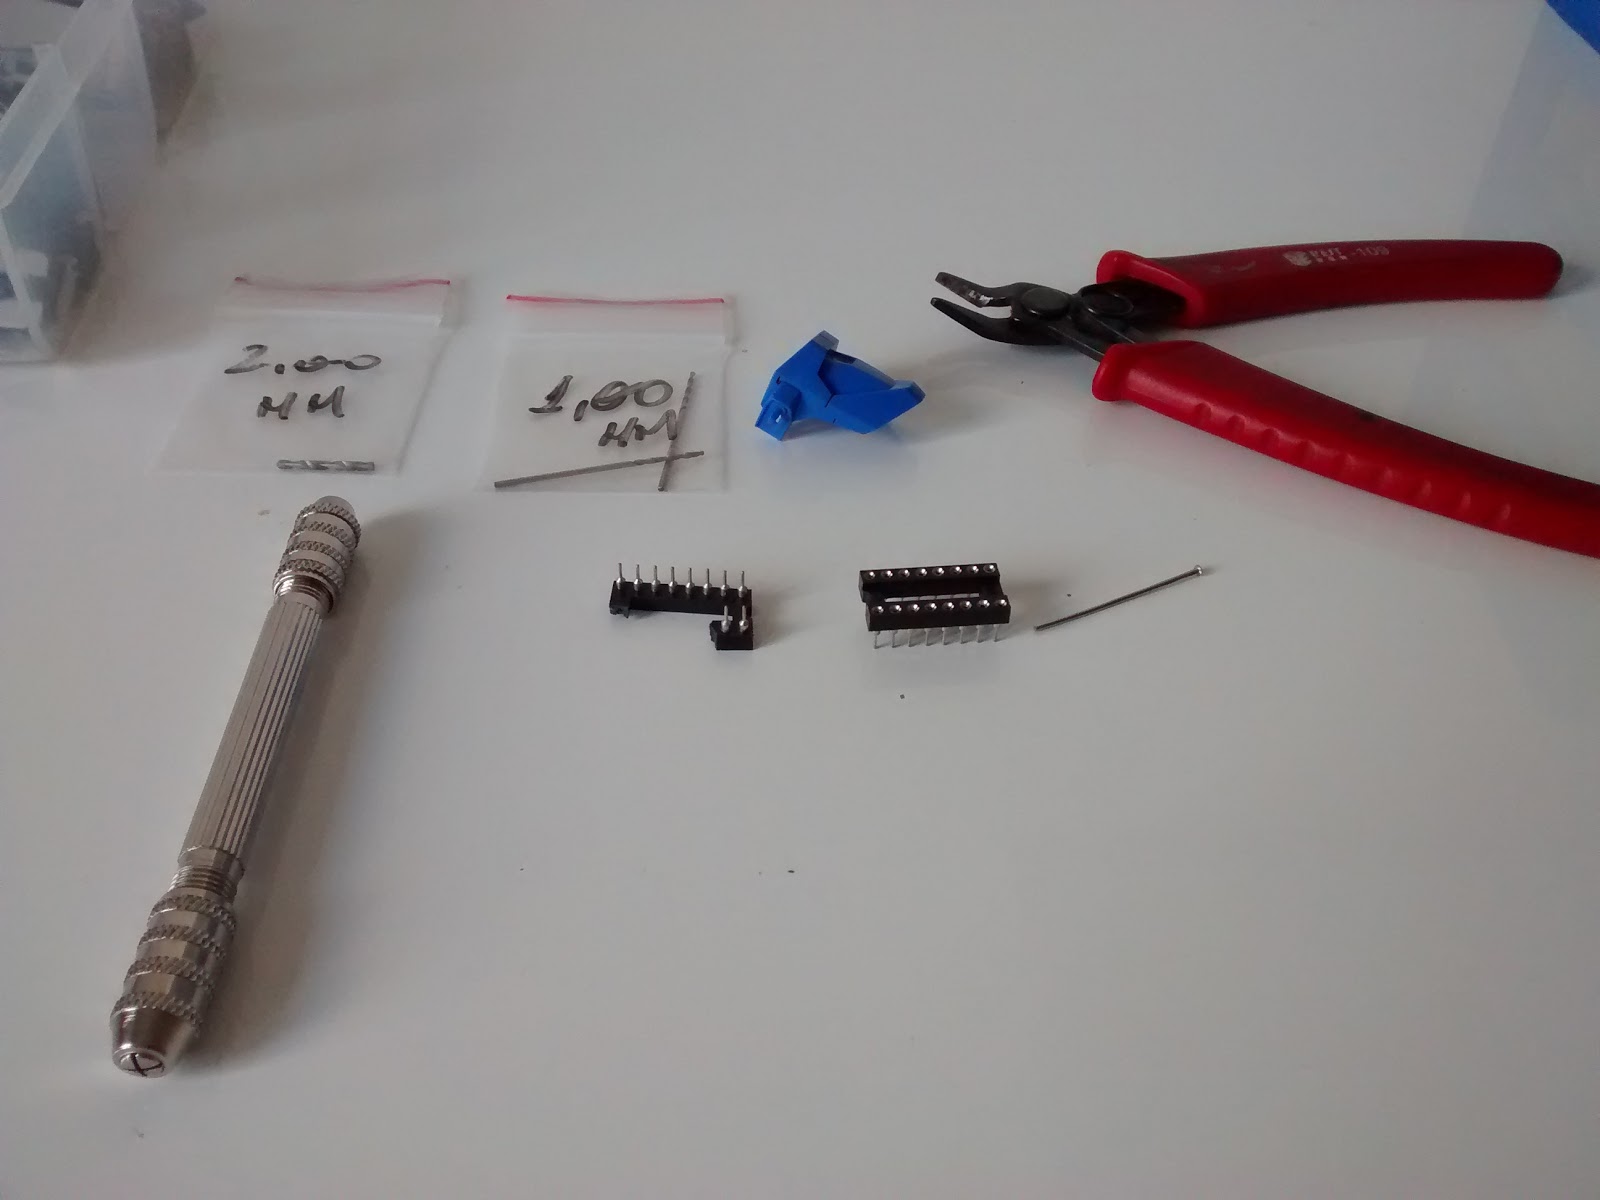
1. Broca Manual (manual Drill); 2. Brocas de tamanhos variados (varied size drill)
3. Alfinete (pin); 4. Alicate (nipper); 5. Soquetes IC (ic Socket); 6. A peça que você vai modificar. (The piece that you will modify.)
Para que serve cada material (what each stuff ?):
1. Broca Manual: Tem capacidade para acoplar diversos tamanhos de brocas para que possa fazer os furos com precisão...
(Drill Manual: It has capacity to engage different sizes of drills so you can make the holes accurately ...)
2. Broca (drill): Acho que não preciso explicar.... XD
(I think not need to explain)
3. Alfinete (pin): parte da mágica, usaremos apenas as cabeças do alfinete.
(part of the magic, we will use only the heads of the pin.)
4. Alicate (nipper): Cortar as cabeças do alfinete e separar os soquetes.
(Cut off the heads of the pin and separate sockets.)
5. Soquetes IC (Ic Socket): Muito útil, pode ser usado como antena, vulcans e mini propulsores.
(Very useful material easy to purchase.It can be used as antennas, vulcans and mini thrusters.)
2. PASSO A PASSO (Step by step)
Muito fácil...
Primeiro, escolha o local onde deseja colocar a cabeça do alfinete (chamaremos de rebite). Com a ponta do próprio alfinete (você também pode usar um bisturi) faça um pequeno furo ou marca que vai servir de guia para que a broca não escorregue quando começar a furar. Lembre-se de escolher uma broca da mesma espessura do alfinete.
Very easy ...
First, choose the location where you want the head of the pin (call rivet). With the tip of the pin itself (you can also use a scalpel) make a small hole or mark that will serve as a guide for the drill does not slip when starting to drill. Remember to choose a drill of the same thickness of the pin.

Com cuidado, faça o furo até a broca perfurar a peça (caso contrário você não conseguirá colar o alfinete depois).
Carefully drill a hole to drill pierce the piece (otherwise you can not paste the pin after).

Coloque o alfinete no lugar e veja se ficou bem encaixado na armadura. Caso não tenha ficado bom, você pode fazer um outro furo no mesmo local, sendo que com uma broca maior (do tamanho da cabeça do alfinete). MAS LEMBRE! Este furo não pode atravessar a peça, tem que ser apenas superficial, assim o alfinete encaixa no espaço e fica rente com a superfície da peça.
Place the pin in place and see if it was properly seated in the armor. If you have not been good, you can make another hole in the same place, and with a larger drill (from the pin head size). BUT REMEMBER! This hole can not cross the piece has to be only skin deep, so the pin fits in the space and is flush with the surface of the part.

Aqui eu coloquei um soquete IC no lugar do alfinete (apenas para demonstração)
Here I put a IC socket in place of the pin (for demonstration)

mas eu gosto mesmo é de colocá-los nos propulsores. Acho mais legal.
but I really like is to put them in the propellers.I think it's cooler.
Bom pessoal,
é essa minha contribuição para o detalhamento dos nossos kits. Até breve!
Good Friends,
this is my contribution to the details of our kits. See you soon!
Nenhum comentário:
Postar um comentário